How to apply an infant colostomy bag using a one-piece system.
We struggled through the first few weeks trying to figure out how to make bags stick. Sometimes we changed his bag 6-8 times in 24 hours. The bags consumed our life. Then, just when we finally mastered the Pouchkins, it was time to upgrade to the child-size bags for our growing baby. After trial and error, several bag products, and loads of tears... here's our strategy. Hopefully, this "photo tutorial" will help you see more leak-free days! We currently average 3-4 days without a leak now!
See bottom of page for TIPS.
See bottom of page for TIPS.
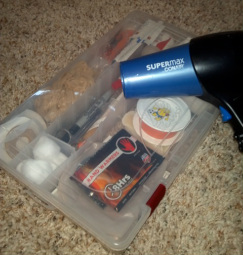
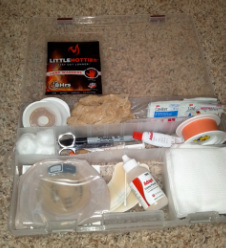
1) Gather Your Supplies

Note: Our son is 5 months old in these photos. We started with the Newborn Pouchkins with the small wafer, but he outgrew that around 3 months. You'll know it's time to upgrade size when they constantly leak!!!
Colostomy Bag (I prefer Hollister 3795 with a roll fold and vent)
Note: I actually found a bag I really liked with a syringe drainable spout intended for ileostomies, but my insurance wouldn't cover it since that wasn't his diagnosis. Draining liquid stool (breastfed, not on solids yet) from a roll fold pouch is tricky. Oh well.
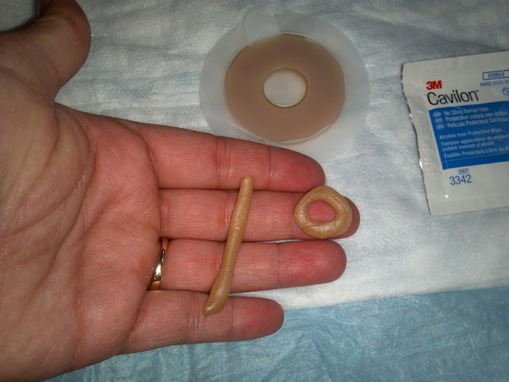
Brava Elastic Barrier Strips (the flat macaroni noodle things) - They give the bag/wafer added support and longer wear time. I swear by these! Get them!
Moldable Barrier Ring (the round donut thing) - Some people use the Barrier Paste, but I found that to be a disaster every time!
Cavilon No-Sting Barrier Film Wipes - I was told to use these when the skin was irritated already, but I found that using them every time worked best for protecting his skin.
Stoma Powder - This is also recommended to use after skin breakdown, but I use it every time.
Blow Dryer
4 x 4" Gauze Pads
"Puppy Pad", Hospital Chuck, or Disposable Bed Protector Pad
- whatever you want to call it!
Scissors
Grocery Bag (for collecting trash and bio-hazard poo bag!)
Distracting (washable) Toy
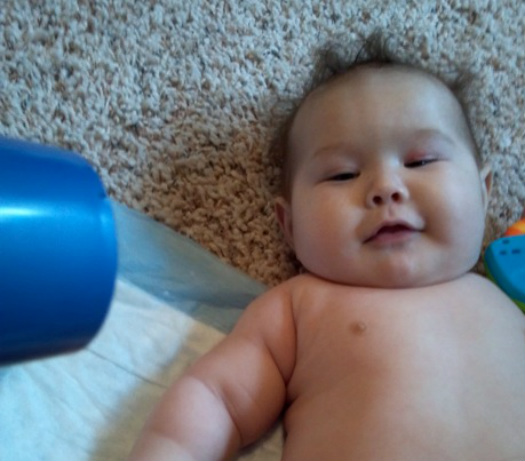
and finally, a very cute, not hungry, not tired baby!
TIP: Make a portable kit.
We got an inexpensive tackle box at Walmart for less than $10 to organize our supplies. This makes it easy to "grab and go" for day trips or even just changing in different rooms of your house. If you don't have access to a blow dryer, keep a few "hand warmers" in your kit. You can also use your own body heat, but I don't find that as effective.
|
|
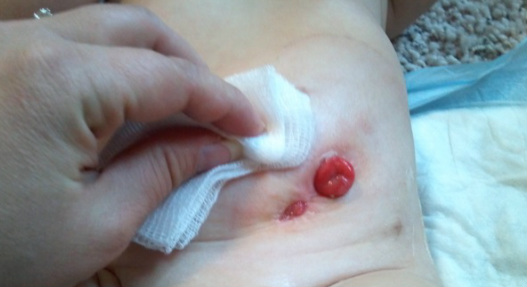
2) Clean the skin and around the stoma(s).
FIRST: Cover the wee wee! In the 15 minutes this process takes me, he always pees! :)
DO NOT use soaps or baby wipes. Use a warm, wet soft cloth or non-woven gauze. It's better to dab, don't rub/scrub. We gave up giving our baby baths since every time we did, bags would leak within hours. He now gets sponge baths and we steer clear of his whole belly!
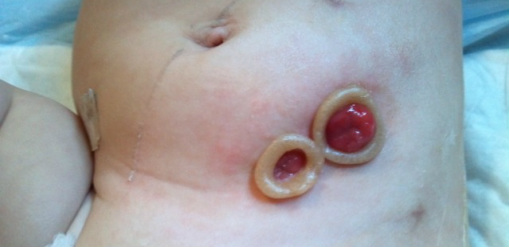
FYI: My son has two stomas... the main stooling stoma and a mucus fistula (the smaller one). The mucus fistula was originally larger, but it shrunk over time and the surgeon says this is fine as long as it's still "pink". Also, the "bruised" looking spots are his surgery incision spots. He just had his LAARP pull-through surgery about 2 weeks ago!
3) Prepare the Pouch and Wafer
We are using a one piece system with the adhesive wafer already attached to the bag.
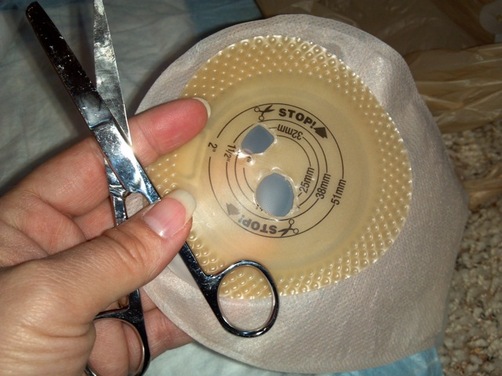
1) Make a template or use the measuring guides included with your bags to draw on the wafer. It's VERY important to get your holes the exact size... SNUG around the stoma. If the hole is too large, stool will leak through faster. Be sure that the position of the holes is such that the drainable end is on the side or bottom for easy draining. I've gotten so good at doing these that I now skip this step.
2) Blow air into the drainable end to inflate the bag before cutting the holes.
3) Cut the wafer. Be careful that you don't pierce the bag on the other side! I did this without realizing it once... leak central.
Note: I was worried about hurting the stoma when I first started, but our surgeon and ostomy nurse assured us that we can't hurt the stoma. They said it doesn't have nerves and the baby can't feel it. A little bleeding is normal from being touched. I also learned in a panic that the stoma changing colors is normal. Our son's stoma faded from cherry red to light pink before our eyes. The color would return within seconds, but it was frightening to watch. As long as the color returns within 30 seconds or so, and it doesn't turn any dark colors (blue, black, grey)... they told me not to worry.
4) Barrier Ring or Barrier Paste
I'm not sure if paste is more often recommended over rings by hospital staff, but we were shown both methods and I prefer the moldable barrier rings. I use the Hollister Adapt Barrier Rings that can be torn and molded like Play-doh to fit the shape of the stoma. It's much less messy than paste and fits the contours of his skin better. I originally didn't understand what this was for until it was explained to me that it's like a "gasket seal". The ring absorbs moisture, protects the skin and prolongs bag life.
Tear off a small piece of the ring and roll into a "snake". Shape into stoma-sized ring. Set aside (not on anything it can stick to). If your baby has two stomas, make two.
If you're going to use Stoma Paste, apply it now to the edge of your cut out circles on the adhesive wafer. Letting it sit for a few minutes helps it stick better and be less gooey when you apply it to baby.
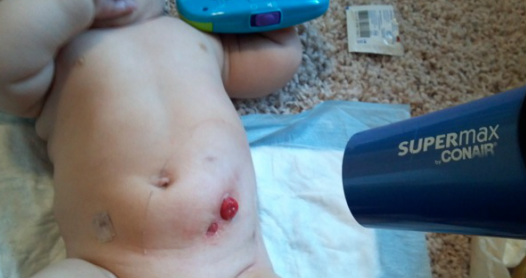
5) Dry Stoma Base + Blow Dry

A completely dry stoma and skin area is critical to your bag sticking! I use a Q-tip to dry around the base of the stoma. I also use a blow dryer on low heat and hold it about 12" away from his skin, constantly moving it for about 15 seconds. This trick was pivotal!
6) Stoma Powder
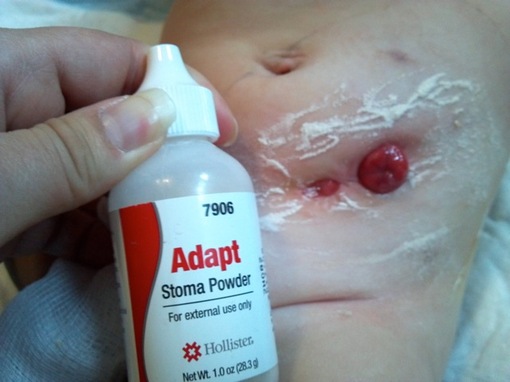
Apply stoma powder lightly... use fingers to gently spread around. Blow off excess.
This helps with any weeping skin or skin moisture.
I've heard this is supposed to be used AFTER skin breakdown, but I choose to use it as a prevention technique and it works for us!
This helps with any weeping skin or skin moisture.
I've heard this is supposed to be used AFTER skin breakdown, but I choose to use it as a prevention technique and it works for us!
7) Skin Barrier Film

Dab the skin barrier film pad (I use Cavilon No-Sting Barrier Film) all around the area where the adhesive wafer will touch. This puts a seal over the skin which protects it when stool starts to leak under the wafer.
8) Blow Dry!
Did I say "use a blow dryer" yet?! Seriously, this really makes a difference. Just be careful to use it on low and keep it moving so you don't burn baby. At this stage, I'm ensuring the Cavilon No-Sting Barrier Film is totally dry.
Don't forget to tease the baby!
Blow dry baby's face while making goofy faces. Gotta keep this fun!
9) Apply Barrier
Place the barrier rings around the stoma. Mold to fit before placing as much as possible. Since the stoma is wet, getting the ring wet more than necessary makes it less effective.
Awww, see his steri-strip still over one of his laporoscopic incision sites on the left?
Awww, see his steri-strip still over one of his laporoscopic incision sites on the left?
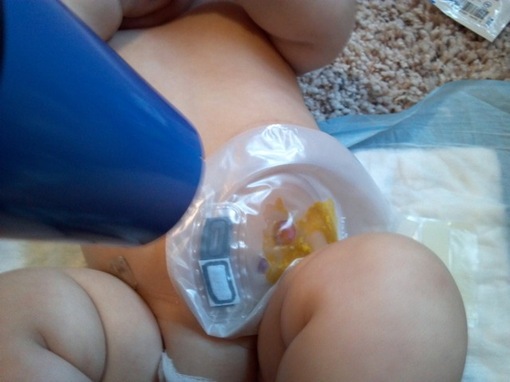
10) Apply the Bag
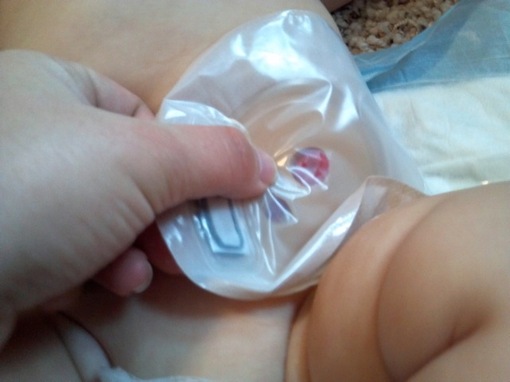
Carefully place the bag over the stoma. Make sure the drainable end is OPEN so that when you push on the bag, you're not squishing air like a balloon. Start from the inside and smooth out. Once the adhesive touches the skin, you should avoid repositioning. The sticking power decreases with every adjustment! My babe has some rolls that need to be pulled flat when I apply the bag so there's no wrinkles.
11) Smooth Around the Stoma
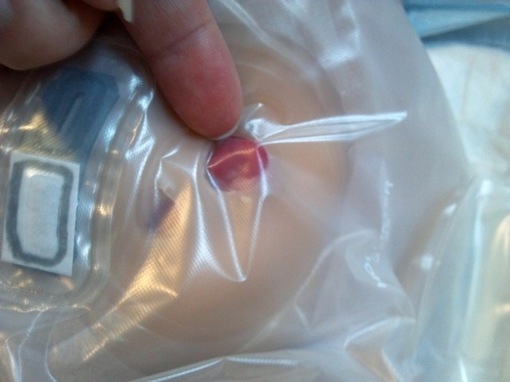
Use the back of your fingernail to gently push around the stoma and help seal the wafer on top of the barrier ring. I try to push the adhesive as flat as I can against his skin, squishing the barrier ring as needed. If I don't, there's a little wrinkle or air pocket that allows stool to immediately sneak out!
12) Yep, Blow Dry AGAIN!
Whew! Got that bag on just in time! Sorry about the graphic view.
I'm telling you... the blow dryer is your friend. I heat the adhesive wafer for a few seconds and use my entire hand to flatly press it down... mold it to the contours of his skin.
Technically, you could be done at this point... but I go the extra mile here... read on!
I'm telling you... the blow dryer is your friend. I heat the adhesive wafer for a few seconds and use my entire hand to flatly press it down... mold it to the contours of his skin.
Technically, you could be done at this point... but I go the extra mile here... read on!
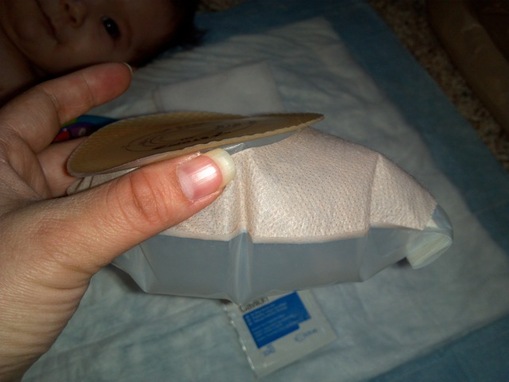
13) Extra Security = Peace of Mind: Barrier Strips
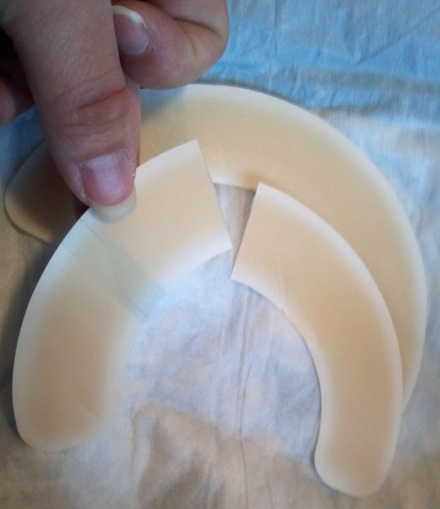
Why are all these products some variation of the word "barrier"? That was so confusing to me!
I use these Brava Elastic Barrier Strips to give the bag added support and leak-free lifespan! I use 1 1/2 or 2 of these per bag change. I cut them to fit around the outside edges of the adhesive wafer. It lays half on the wafer, half on his skin, under the bag portion. These are so flexible, they're perfect for bendy areas near the thigh or "bikini line" where baby wiggles and the adhesive wafer is more vulnerable.
14) ALL DONE!
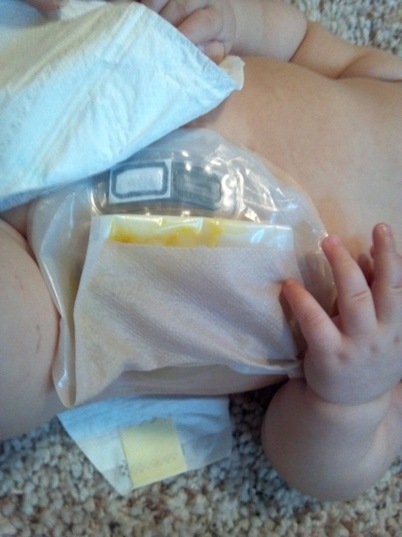
Fold the bag to fit under the diaper comfortably or wrap it around to toward baby's back. If baby stools a lot, I'd wrap it around so stool has more place to drain away from the stoma.
Yay! Baby is fresh and happy!
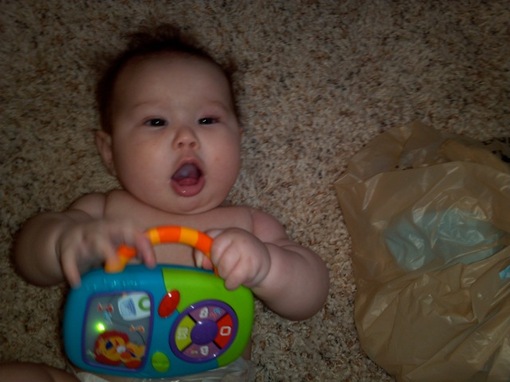
Dispose of your bio-hazard grocery bag, kiss your baby and enjoy several days of leak-free bliss before your next at-will change! Yipeee!
MORE TIPS:
Call the ostomy supply companies like Hollister or Coloplast directly and request free samples and a catalog. These companies are very attentive and eager to help you find the right products. I received samples within days.
Burp the bag when you see that it's full of air. Even a little air in there causes pressure on the seal to build.
Drain several times a day. The less weight in the bag and less wet stool around the stoma, the less chance of leaks and skin breakdown.
Place a cotton ball inside the bag to help soak up the stool in between drainings.
If using a separate wafer, warm it by sticking it in your bra or armpit while you prepare supplies. Softening it like this will help it mold to baby's skin better.
Write the date/time on a sticker and put it on the bag to identify how long the bag has been on.
Use "pink HY Tape" as added support if you can't use the Brava Elastic Barrier Strips.
If you have good insurance, you can get the disposable bed pads and the gauze added to your prescription as a "necessary item".
If you can't use a blow dryer, blow on the skin to dry. Use a "heel warmer" or "camping hand warmer" to heat the wafer for molding it to skin.
If you are using stoma paste, fill a fine point syringe with the paste first. Use the syringe to apply the paste with more precision.
Use a syringe to drain Newborn Pouchkins or bags with a spout.
Use odor reducing drops/oils in the bag sparingly. I've heard they really don't work well and make the bag a mess.
More tips you think I should add here? Email me.
